Setting up multiple displays can significantly enhance your productivity and gaming experience. The first step towards achieving this involves installing a video adapter card. In this guide, we’ll walk you through the process from start to finish.
Tools and Materials Needed
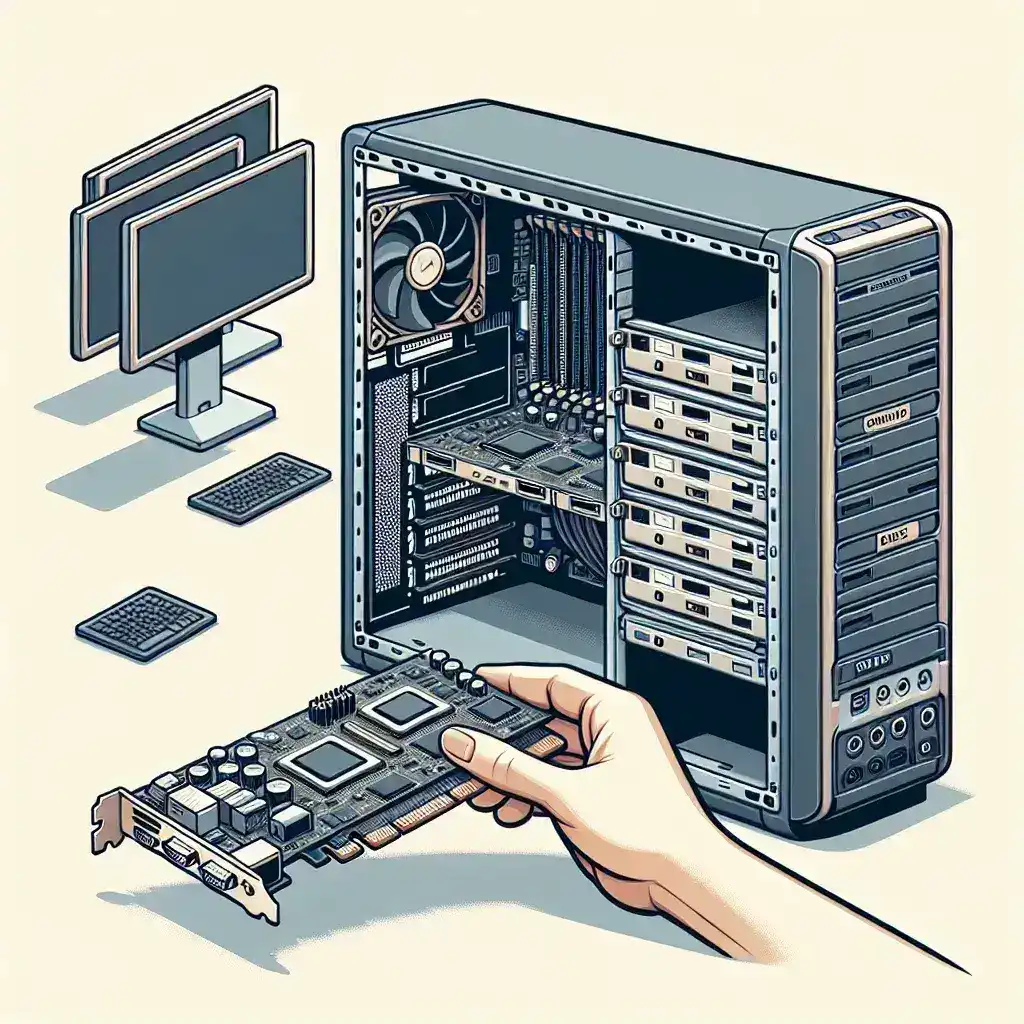
- A video adapter card (ensure it’s compatible with your system)
- Screwdriver
- Anti-static wrist strap
- Multiple monitors
- HDMI, DisplayPort, or other necessary cables
Step-by-Step Installation Guide
Step 1: Power Down and Unplug Everything
Before you start, ensure your computer is completely powered down and unplug it from the power source. This is crucial to prevent any electrical mishaps.
Step 2: Open Your Computer Case
Using a screwdriver, remove the screws holding the side panel of your case in place. Set the screws aside in a safe location as you’ll need them later.
Step 3: Ground Yourself
Static electricity can damage your computer components. Wear an anti-static wrist strap or periodically touch a grounded metal object to discharge static electricity.
Step 4: Locate the PCIe Slot
Identify the PCIe slot on your motherboard, usually located near the bottom. If you already have an existing video card installed, you’ll need to remove it first.
Step 5: Insert the Video Adapter Card
Gently align the video adapter card with the PCIe slot and press it firmly into place. Make sure it is securely seated to avoid any installation issues.
Step 6: Secure the Card
Using one of the screws you set aside, secure the video adapter card to the case. This will ensure the card stays in place and doesn’t move while the computer is in use.
Step 7: Close the Case
Once your card is securely installed, replace the side panel of your computer case and screw it back into place.
Step 8: Reconnect and Power On
Reconnect all cables to your computer and plug it back into the power source. Turn on your computer to move to the next step.
Step 9: Install Drivers
Once your computer is powered on, you’ll need to install the drivers for your new video adapter card. These can typically be found on the manufacturer’s website or included on a CD that came with the card.
Step 10: Connect Your Monitors
| Monitor | Connection Type | Port on Video Card |
|---|---|---|
| Monitor 1 | HDMI | HDMI Port |
| Monitor 2 | DisplayPort | DisplayPort |
| Monitor 3 | VGA | VGA Port |
Use the appropriate cables to connect each monitor to the correct port on your video adapter card.
Configuring Your Multiple Displays
Step 1: Access Display Settings
Right-click on the desktop and select “Display settings.” This will open a window where you can configure your monitors.
Step 2: Identify Your Monitors
Click the “Identify” button to see which monitors correspond to each number on the screen. This will help you arrange them correctly.
Step 3: Arrange Your Displays
Drag and drop the display boxes to match the physical arrangement of your monitors. This will make navigation seamless across multiple screens.
Step 4: Set Resolution and Orientation
Select each monitor and adjust the resolution and orientation (landscape or portrait) as needed.
Step 5: Apply Settings
Click “Apply” to save your changes. Your screens may flicker as the new settings are applied.
Troubleshooting Tips
- Monitor Not Detected: Re-check cable connections and ensure the monitors are powered on. Restart your computer if necessary.
- Display Quality Issues: Adjust the resolution and refresh rate in the display settings.
- Driver Problems: Ensure you have the latest drivers installed. Visit the card manufacturer’s website for updates.
- Card Not Seated Properly: If your computer doesn’t recognize the new card, re-open the case and ensure the card is firmly seated in the PCIe slot.
Conclusion
Installing a video adapter card for multiple displays isn’t as daunting as it might seem. By following these steps, you can easily set up a multi-monitor configuration that enhances your computing experience. Whether for gaming, work, or general multitasking, multiple displays can offer significant benefits.