Installing a parallel port expansion card can enhance your computer’s connectivity, especially if you need to connect older devices that require this type of port. The process is straightforward if you follow the right steps and precautions. This guide will walk you through each step to ensure a successful installation.
Understanding Parallel Port Expansion Cards
A parallel port, often referred to as a printer port, is a type of interface found on computers for connecting peripherals. While USB has largely replaced it, parallel ports are still necessary for specific applications. An expansion card adds these ports to modern computers that lack them.
Uses and Benefits
Parallel ports are commonly used for:
- Connecting old printers
- Industrial automation devices
- Legacy hardware requiring parallel communication
- Specialized scientific equipment
Adding an expansion card can breathe new life into older technology, ensuring compatibility and extending your hardware’s usability.
Steps to Install a Parallel Port Expansion Card
Step 1: Gather Your Tools
Before starting the installation, gather the following tools:
- Phillips screwdriver
- Anti-static wrist strap (recommended)
- Parallel port expansion card
- Installation manual (if available)
Step 2: Power Down and Unplug Your Computer
Ensure your computer is completely powered off and unplugged from any power source. This is crucial for your safety and to prevent any damage to internal components.
Step 3: Open Your Computer Case
Depending on your computer model, you may need to remove screws or slide a latch to open the case. Refer to your computer’s manual for specific instructions.
Step 4: Locate an Available PCI Slot
Find an empty PCI slot inside your computer. These slots are usually white and easily identifiable. Refer to your motherboard’s layout diagram if you have trouble locating them.
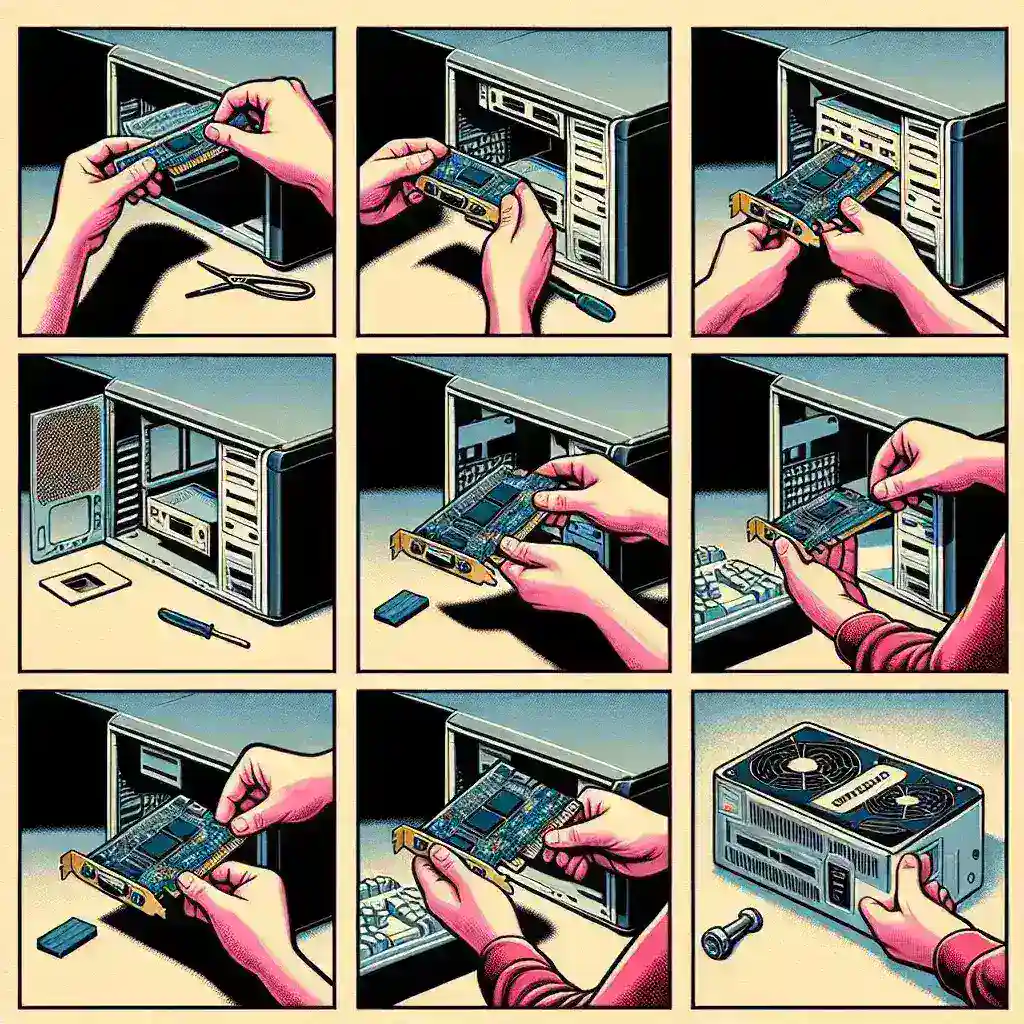
Step 5: Insert the Parallel Port Expansion Card
Carefully align the expansion card with the PCI slot and press it firmly but gently into place. Ensure that it is securely seated and the card’s rear bracket aligns with the corresponding opening in the case.
Step 6: Secure the Expansion Card
Screw the card’s rear bracket to the computer case to ensure it is firmly attached and doesn’t move.
Step 7: Close the Computer Case
Once the card is securely installed, close your computer case and reattach any screws or latches.
Step 8: Reconnect Power and Boot Up
Plug your computer back into the power source and power it on. Wait for the operating system to load.
Step 9: Install Necessary Drivers
Most parallel port expansion cards come with driver software on a CD or available for download from the manufacturer’s website. Follow the instructions to install these drivers.
Step 10: Verify Installation
Check your system’s device manager to ensure the new parallel port is recognized and functioning correctly. If any issues are detected, refer to the troubleshooting section of the card’s manual or the manufacturer’s support page.
Step 11: Test the Parallel Port
Connect a device that uses a parallel port to confirm that the port is working as expected. This ensures that the installation was successful and the expansion card is functioning correctly.
| Step | Description |
|---|---|
| Gather Tools | Phillips screwdriver, anti-static wrist strap, expansion card, manual |
| Power Down | Turn off and unplug your computer |
| Open Case | Remove screws or slide latch to open |
| Locate PCI Slot | Find an empty slot on the motherboard |
| Insert Card | Place the expansion card into the PCI slot |
| Secure Card | Screw the card’s bracket to the case |
| Close Case | Reattach screws or latches |
| Reconnect Power | Plug in and power on the computer |
| Install Drivers | Load necessary driver software |
| Verify Installation | Check device manager |
| Test Port | Connect a parallel device |
Troubleshooting Tips
Driver Issues
If the system doesn’t recognize the new parallel port, ensure the drivers are correctly installed. You may need to reinstall or update the drivers from the manufacturer’s website.
Hardware Conflicts
Sometimes, other installed hardware may conflict with the new expansion card. Check the device manager for any conflict notifications and disable conflicting devices temporarily to test functionality.
Physical Connectivity
If the connected device is not working, ensure that the parallel port cable is correctly plugged in and that the device itself is functioning.
Conclusion
Adding a parallel port expansion card is a manageable DIY task that can significantly enhance your system’s connectivity options. By following these detailed steps, you can ensure a smooth installation process and start enjoying the benefits of expanded hardware compatibility.